Are steep slopes or hills in your backyard making movement around these areas tiresome and difficult? Constructing stairs will ease movement along those slopes. However, how do you go about building stairs on a steep slope?
To successfully build stairs on a steep slope, you need to measure and take note of the rise and run of the slope. Next, estimate the number of steps you’d need together with the step’s height and width. After this, trace the stairway using ropes, wood stakes, or spray paint. Then, level the first tread with the ground and build the next riser on the first tread’s back edge. Finally, dig from the bottom, work your way up with a spade, and end the project by filling in your chosen material.
This step-by-step guide contains detailed information to help make the steep slopes less dangerous and aesthetically pleasing.
How to Build Stairs on a Steep Slope?
The entire process for correctly constructing stairs on a steep slope is divided into these four stages;
- Planning
- Measurements
- Supplies
- Procedure
Stage 1: Planning
This stage involves you creating an outline of the design you desire. While on it, you also need to measure the slope and calculate how many steps to make.
There are two significant ways to construct stairs on a steep slope. You can either
- Dig the stairs into the ground, or
- Build them on a frame over the slope.
Each method uses different procedures and supplies but delivers the same result of making mobility easy and safe. Whichever method you choose, be sure to measure the dimensions of the stairs.
Stage 2: Measuring the Distances
The dimensions you need to measure are:
- The slope’s total rise, i.e., vertical distance,
- The slope’s entire run, i.e., horizontal distance, and
- The length, height, and width of each stair.
Here’s how to go about the measurement process.
Step 1: To measure the rise and run of the slope, drive a 2×4 wood bar at the bottom of the slope. Next, drive in another 2×4 bar in the middle, parallel to the first one.
Step 2: Place a straight edge from the top ground of the slope to the middle bar and ensure it is level. Mark the point the straight edge makes on the middle bar. This would form part of the measurements of the rise.
Repeat these steps with a straight edge from the middle bar’s base to the bottom bar of the slope. Ensure it is level and mark the points the straight edge makes on both bars.
Step 3: For the run, measure the length of the distance between the bars and the top level. The horizontal distance between the points marked on two bars is added to the distance between the marks on the middle and top levels. This gives the total length of the slope.
For the rise, measure the vertical length from the base of the bars to the points marked. Add up both, and you have the total height of the slope.
You can watch the video below for tips on calculating the dimensions of a steep slope.
Step 4: Divide the slope’s rise by 7″ to get the number of stairs you’d be constructing. Actually, you can use any number between 6-8″. To get the tread of each step, divide the total run by the number of steps.
Typically, the width of stairs made in the United States is about 11″, so you will have enough feet area when walking on the stairs.
Key Takeaway:
- Brace the 2×4 with some stakes and screws.
- The height of the 2×4 should be something you can reach easily.
- Add extra bars in the middle for long or steep slopes.
Stage 3: Gathering the Necessary Supplies
There are several materials and equipment you can use in making your stairway. Here are some of the general supplies you’d need:
1. Measuring
- Measuring Tape
- Spirit level and line level.
- Straight edge
2. Tracing
- Spray paint
- Wood bars and stakes
- String
3. Digging
- Spade
- Digger
- Hoe
4. Filling
- Gravel
- Loose earth
- Masonry sand
- Concrete
- Troughs/Buckets
- Wheelbarrow
5. Accessories
- Flowerpots
- Garden lamps
- Rails
- Grass beds
Use wooden planks, natural stones, or masonries like concrete blocks, pavers, and bricks as tread material. This depends on the soil type, climate, budget, and skill set.
Suppose you live in a temperate region with frigid winters. In that case, we advise against using stone steps as they may become slippery and increase the risk of accidents.
If you’d be using wooden planks, go for ground contact pressure-treated lumber. Also, stain the wood boards for added protection against attack from moisture, microbes, and vermin.
Your choice of tread material also depends on the design you’d be constructing. If you’d be cutting the stairs into the ground, you can use any of them. But for framed staircases, wood is the go-to material.
Stage 4: The Construction Procedures
As mentioned earlier, two distinct methods exist for building stairs on a steep slope. They are
- Cutting the stairs into the ground
- Building a step ladder
Method 1: Cutting the Stairs into the Ground
Step 1: Begin by mapping out the borders of the stairway with stakes and strings. Then, remove any weeds, grass, stones, or loose topsoil in the mapped-out area. Once this is done, drive the stakes to the ground at the four edges of the stairway.
Next, proceed to tie strings between them at the base, ensuring it is taut and straight with a line level. If you’d be making a curved stairway or a zig-zag, ensure that the lines are tied to reflect.
You can also use strings to trace out the lines of each stair. These string lines must be evenly spaced and perpendicular to the lines at the border of the stairway. A builder’s square will help in this aspect.
N.B: Alternatively, you can trace out the borders of the walkway and the treads with a tracing line spray paint.
Step 2: Now, it is time to dig out the bottom tread with a spade. First, dig vertically into the ground at the back line of this tread to make the first riser. Then, dig out the earth horizontally, so it is level with the foot of the hill. You may need to loosen the soil if too stiff or compact with a digger or hoe.
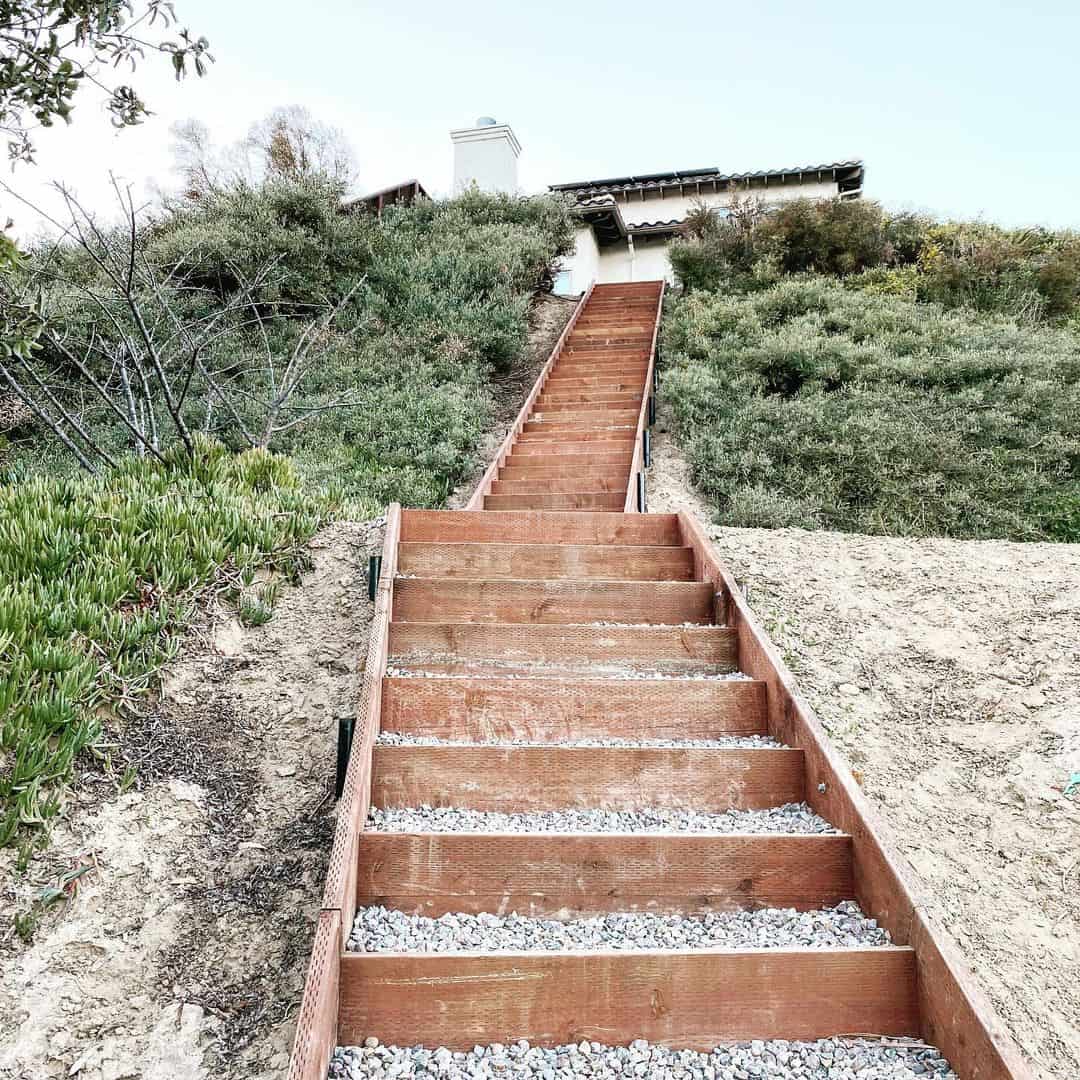
Step 3: Place your tread material. Arrange the stone steps, bricks, pavers, or blocks as you desire, and fill the cracks and crevices with gravel, concrete or fine sand.
Step 4: Dig the next riser on the back line of the next tread. Repeat the steps and work your way to the top. Ensure each thread and riser are level and parallel to the next with a spirit level. If the concrete mortar is your filler, allow it to dry for about 24 hours before using the stairs.
Step 5: Finish up by sweeping off the dirt, loose earth, or gravel from the stairs. Add accessories like garden lamps, flower pots, or grass beds on the sides of the stairs.
The video below shows how a beautiful stone stairway was made on a slope with loose soil.
Key Takeaway:
- You may need to spread gravel or concrete on the dug area before putting the stone, bricks, or blocks, especially if the ground needs to be compacted.
- Always begin digging at the bottom and work your way step by step to the top.
- You can also make retaining walls on the sides of the stairway.
Using large retaining boards as vertical barriers will help improve drainage and prevent erosion in the stairs. It will also hold back the soil and the materials used in making the risers and footing strips.
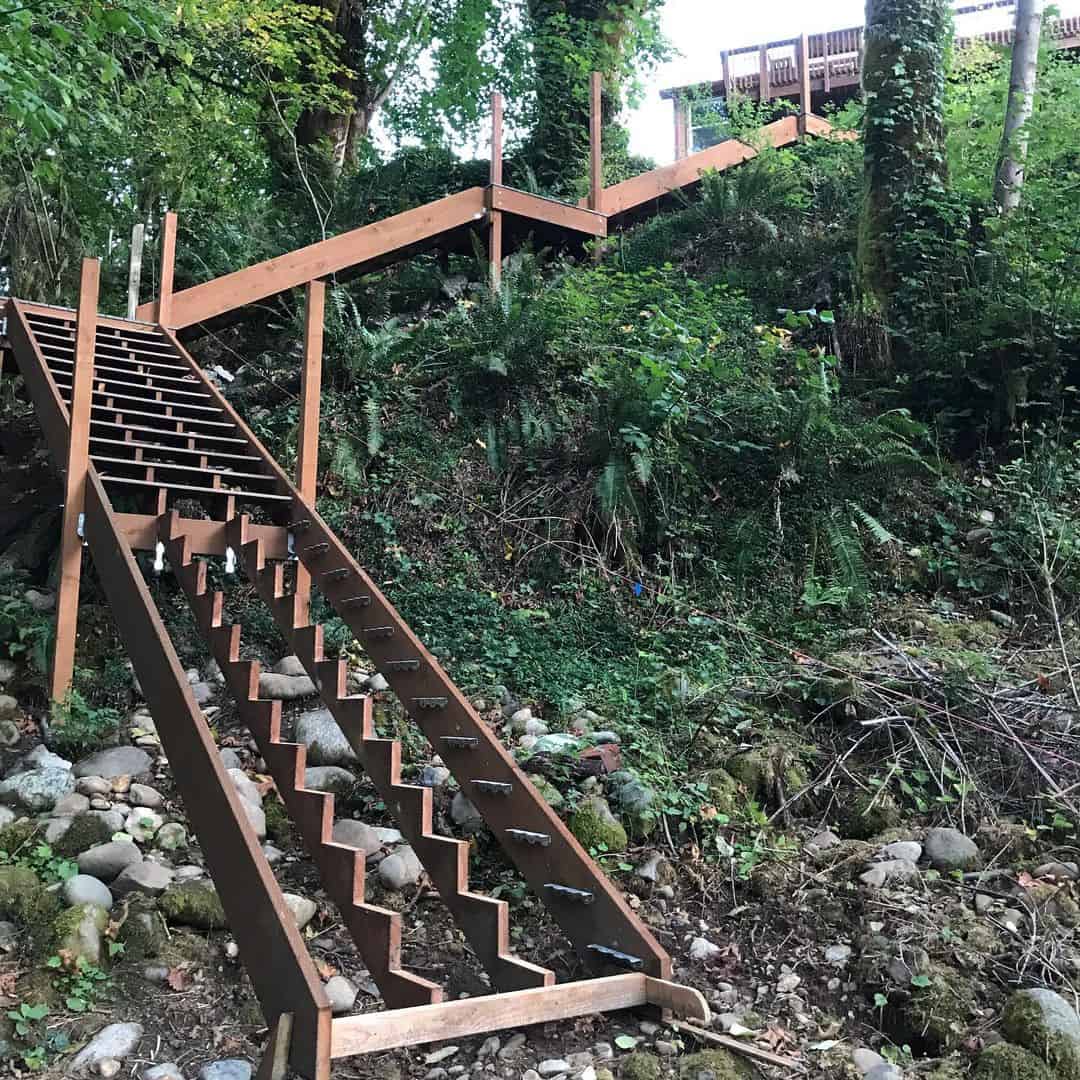
Method 2: Building a Stepladder Over a Steep Slope
In addition to the general supplies, you need the following items for this method.
- 6×6 inches wooden planks
- Saw
- Drill and screws, or hammer and nails
Step 1: Map out the perimeter of the staircase by driving wooden posts into the ground at the top and bottom edges of the slope. Dig a trench at each edge, put in the bars, and fill up with concrete for reinforcement. Tie string lines between the four posts.
If the steep slope is quite long, you should drive in extra posts in the middle.
Step 2: Calculate the slope’s total length using its total rise and run as described above. Alternatively, you can determine the slope’s total length using your tape measure. Place it directly on the ground from the top of the hill to the bottom and note the size. This works best in cases where the slope is more curved than straight.
Divide the run and rise of the slope. Use this to get the number of stairs and the height and length of each stair, as described previously.
Step 3: Make the frame for the stepladder using the dimensions obtained. Measure and mark the slope’s total length on the 6×6 wood planks. Measure and mark each stair level, i.e., the risers and treads on the boards.
Step 4: Cut the beams to size. Also, cut out these areas from the wooden beams if you’d fit the treads into pockets made in the boards. Fix the beams to the posts on both sides to form the frame of the stepladder.
Another way to anchor these sidebars is to dig shallow trenches on the left and right sides of the stairway and place the beams in them.
Step 5: Cut the 6×6 wood boards to size using the dimensions of each step already determined. Place the runners on these pockets and drill the screws or nails into them.
Alternatively, you can mark each stair level on the beams and fix individual runners in between the beams. You don’t need to cut out stair pockets. Just ensure the runners are level and nail them to the frame.
Step 6: Make handrails on the posts for support and easier climbing. Add other accessories like lamps and flower pots on the borders of the ladder. Your staircase is all set and ready.
Final Thoughts
Steep slopes can be a lot of work to walk along. Miss a step, and you may fall and get hurt. Stairs make walking along slopes or hills a lot easier and safer. Building them may be a challenge, but you can do it.
- Calculate the slope’s rise and run.
- Determine the number of steps you’ll need and the height and width of each one.
- Use ropes, wood bars, or spray paint to trace the stairway.
- Level the bottom step with the ground. Build the next riser on the back edge of the first tread. Start digging at the bottom and work your way up step by step.
- Arrange your treads and fill them with gravel and sand; there you have it!