
Flaring the copper tubing is pretty straightforward if you know the right techniques and have access to appropriate flaring tools. Copper pipes are flared to ensure the compression fittings remain intact and leak-proof.
Although there are several ways to join copper tubings, like soldering and brazing, flaring is done where you need a mechanical joint or can’t use open flames to weld the pipes together.
Let’s review the different techniques used to flare copper tubing with detailed instructions about each copper pipe flaring technique.
The Process Of Flaring Copper Tubing
It is recommended to opt for a flaring kit. These kits come in several variations, depending on their usage. A basic flare kit contains a flared form and a reamer. The flaring form has several holes able to fit copper tubings of varying diameters.
The flaring form assists in holding the pipe firmly. Before sliding the pipe in the flare form, remember to slide the compression nut. The reamer consists of a point, holding arms, and a screw. It’s the tool involved directly in flaring.
Flaring copper water tubing used in households is simpler than flaring water supply lines. For more significant water lines or pipes, it’s best to get professional assistance.
Step 1: Cutting The Tubing
The first step is to cut the pipe to the correct length. Before you proceed, remember that copper pipes need to be cut precisely and evenly. Using a hacksaw can be a great choice to cut water tubings; cutting copper tubing requires a tube-cutting tool.
A hacksaw might leave the newly cut ends uneven and rough whereas a pipe cutter’s blade makes a cut around the circumference of the copper tubing, resulting in smooth cuts. Ragged edges can lead to a failed connection or a leak in the pipe.
- Measure the length you want to use and mark the area you want to cut.
- Secure the cutter tool on the copper pipe.
- Tighten the jaws of the cutter when using an adjustable pipe-cutting tool.
- When cutting the line, ensure you have a firm grip on the tubing.
- Rotate the cutter entirely around the pipe, creating a circular groove.
- Tighten the knob on each rotation and keep rotating the tool slowly in circles to make a smooth cut.
- As the cutting tool circles around the pipe, the groove deepens until a smooth and precise amount is achieved.
Step 2: Trimming Loose Ends
Most pipe cutters include a deburring blade attached to the tool’s back. Use the deburring tool to ensure the cut is smooth and has the original diameter.
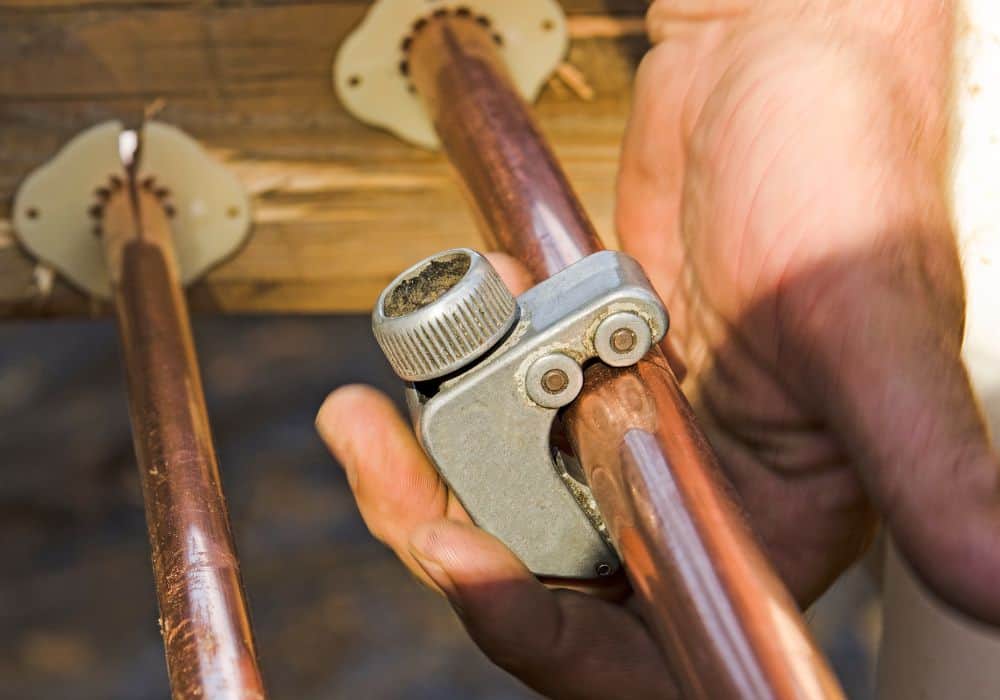
Step 3: Using A Flare Form
A flare form is a plumbing tool with different holes for different pipe diameters. This tool keeps the copper pipe secure and assists in cutting without altering the diameter.
It’s crucial to pick a suitable diameter and leave 1/16th of an inch at the end of the pipe to achieve the best outcomes.
Step 4: Tightening The Nuts And Fitting The Yoke
First, tighten the nearest nut and then move to tighten the nut farther away. You can use your hands to tighten the nuts. Then, adjust the yoke to the right place to ensure the flaring block is engaged.
Step 5: Secure Reamer On The Flare Form
Place the reamer on the flare form, making the conical point of the flare form to be centered on the tubing.
Step 6: Flaring The Copper Tubing
Slowly tighten the screw on the reamer to flare the copper. As you tighten the reamer, the copper gets flared. Avoid tightening the reamer too much, as it can make the tubing slide or make the tubing split, affecting the end results.
In situations like these, you must make a new cut near the flared part and repeat the flaring process until you achieve the desired results. Now loosen the reamer to dislodge it from the flaring form. After removing the reamer, loosen the clamps on the flare form and remove the pipe.
Step 7: Attaching The Fitting
Flared fitting is used for flared copper pipes. Soft steel and aluminum can also use these compression fittings for a secure joint. A flared fitting has a flaring nut and a tapered end.
The flared end of the pipe needs to be secured to the tapered end of the fitting. Tighten the flare nut, making a leak-proof seal.
- Place the flare nut behind the copper pipe.
- Align the flared copper end with the tapered end and slide until the fitting and the pipe is tight. Slide the flare nut on the fitting and tighten it with a wrench to make the connection leak-proof.
In case of defects like a leak, you may need to repeat the flaring process all over again. When your flaring is successful, the flared end makes a 45-degree angle and quickly covers the fitting.
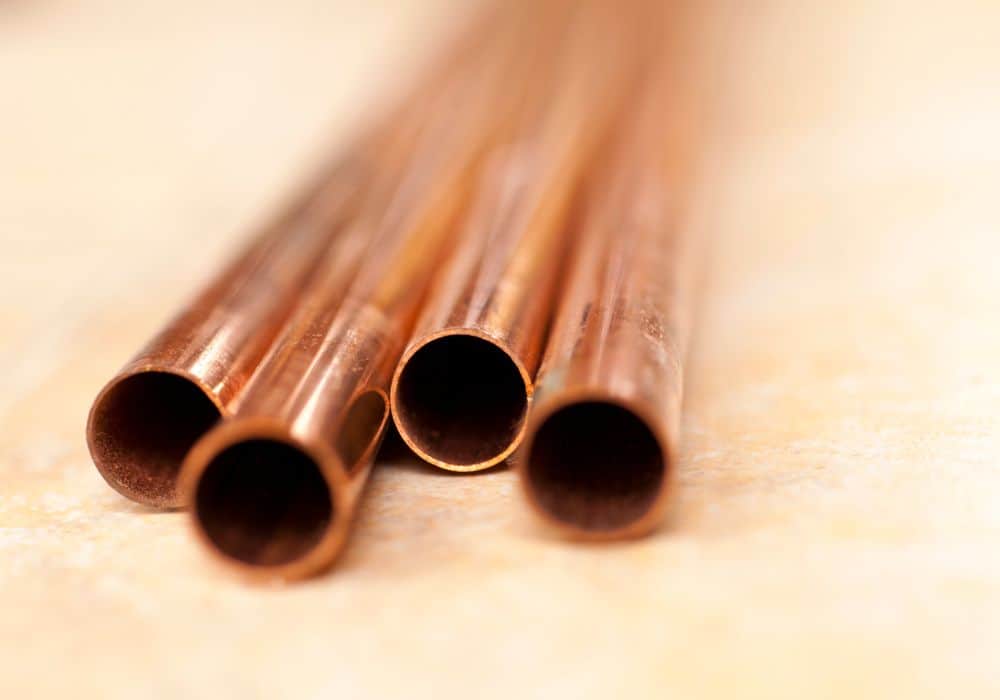
Types Of Copper Tubings Used In Flaring
There are four types of copper tubings: K, L, M, and DMV.
Out of these types, type K copper pipes have the thickest diameter and are ideal for flaring. The wall thickness of type K can withstand enlargement occurring in the process of flaring.
Types L and M are hard tubings, whereas type K is soft tubing, making it an excellent choice for flaring.
1. Hammer Flaring
It’s a flaring technique, also referred to as swaging. Here are the steps to follow.
- Secure the tubing in clamps and cut the pipe to the desired length.
- Use a reaming blade or a sand cloth to remove the burr left on the cut end.
- Place the flaring nut on the pipe.
- Apply grease on the flaring tool and insert it into the copper pipe.
- Strike the flaring tool using a soft brass hammer while rotating the device after each strike.
- Check for any defects to ensure there are no leaks.
- Tighten the coupling nut to seal the connection.
2. Using A Tube Expander
It’s the easiest way to flare a copper pipe. The tool has several heads suitable for different copper pipe diameters.
- Connect the right-sized head to the tube expander.
- Slide in the end if you want to flare.
- Squeeze the tool to flare the tubing.
- Make sure you use the tool with sturdy hands and apply equal pressure to adequately flare the pipe end.
3. Using A Bar Type Flaring Tool
It’s the most common type of flaring tool out there. It’s an ideal pick for confined spaces and can flare pipes ranging in diameter between 3/16 and 5/8 inches.
- Insert the copper pipe into the tool.
- Choose an appropriate-sized hole to insert the pipe.
- Measure how much you need to flare before pushing it through the hole.
The bar-type tool has several variations. Therefore, it’s best to follow the operating manual provided by the manufacturer for effective results.
Difference Between Flaring And Swaging
Although both techniques are used to open the pipe ends and secure them firmly for leak-tight connections. Still, there are a few differences.
- The flaring technique creates shallow flares, similar to a funnel, whereas swaging can go deep into the tubing, allowing you to increase the diameter further down the tubing.
- While flaring is preferred for soft materials like copper, aluminum, and soft steel, swaging is used for hard metals.
Hard metals can be flared but need to be annealed to make the end pliable. Besides using the flaring technique, copper tubings can be soldered or brazed if the lines are not used to transport oil or gas.
Brazing is a feasible choice for loose joints or fittings. However, the process of brazing requires running nitrogen within the pipe to avoid oxidization and subsequent damage. In soldering, using flux prevents oxidization which can be wiped off after the task completes.
Using Brass Fittings
Fittings made of brass are the preferred material to use with copper pipes due to their malleability, durability, and ease of use. Another reason to choose brass fittings is that this material doesn’t trigger electrolysis, leading to the rotting of the pipe.
Besides being durable, the metal is fire-resistant and works impeccably when exposed to hot water.
As mentioned earlier, K-type copper pipes not more than 2 inches in diameter are used as they can be bent or shaped easily without worrying about cracking or splitting. Flaring a copper pipe with more than 2 inches of diameter will require a higher level of expertise and specialized tools.
Drawbacks Of Not Flaring Copper Pipes
Avoiding flaring copper tubings will only lead to unnecessary repairs that may break the bank. Attaching copper tubing without flaring it adequately always results in a disaster.
Without a proper flare, the copper tubing cannot stay connected to the fitting and slip out, compromising the utility.
A leaky pipe can further cause water flooding in the premises or increase gas exposure in the surroundings if the tubings are used to transport gases.
Bottom Line
Flaring is a simple process when done the right way. Besides getting familiar with the right set of tools, ensure you understand your requirements to achieve the best possible outcomes.
We hope the information shared here assists you in flaring the copper pipe without a hitch.